An open-source Rubik's cube solving robot built with BrickPi3, a Raspberry Pi camera, and LEGO Mindstorms. Scans all six faces and calculates the optimal solution in under 2 minutes.
PythonComputer VisionRaspberry Pi CameraLEGO EV3Open Source
Watch It in Action
▶
YouTube – Privacy Notice
This video is hosted on YouTube. Clicking "Accept & Watch" will load the
video and allow YouTube (Google) to set cookies and track your viewing.
See Google's Privacy Policy.
Background
The Rubik's cube — invented in 1974 and the world's best-selling toy — requires
thought, skill, and plenty of patience. So why not let a robot do it?
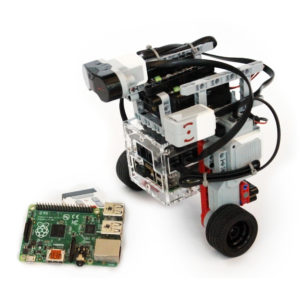
The BricKuber combines a Raspberry Pi, BrickPi3, and LEGO Mindstorms to build a
fully automated Rubik's cube solver. Place an unsolved cube in the cradle, run
the Python program, and watch as the robot scans each face, computes the optimal
solution, and executes every move in under two minutes.
This project is inspired by the
MindCub3r design for LEGO EV3,
extended to use the Raspberry Pi Camera instead of the EV3 Color Sensor.
Tools & Materials
BrickPi3 (Core or Starter Kit)
Raspberry Pi (Pi 3 or newer)
Raspberry Pi Camera Module
LEGO Mindstorms EV3 Kit (31313) — includes 2 large motors & 1 medium motor
A standard 3×3 Rubik's Cube (any freely-spinning cube works)
Ethernet cable or Wi-Fi dongle (internet connection needed for initial setup)
Build It
Step 1 – Build the Base Structure
Start with the MindCub3r design. Full LEGO building instructions are available at
mindcuber.com. The BricKuber
has three major moving parts:
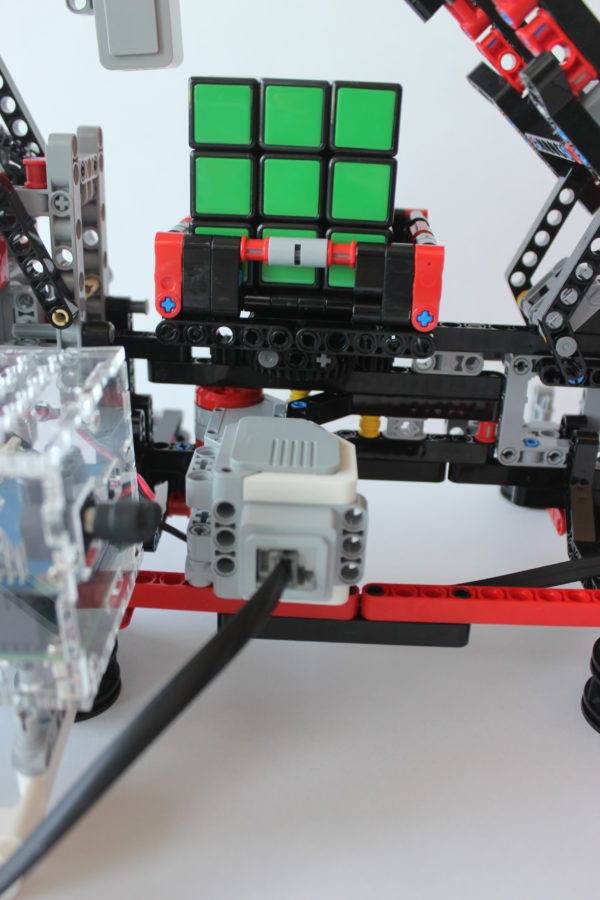
Cube cradle — holds and rotates the Rubik's cube
Shuffler arm — flips the cube onto a different axis
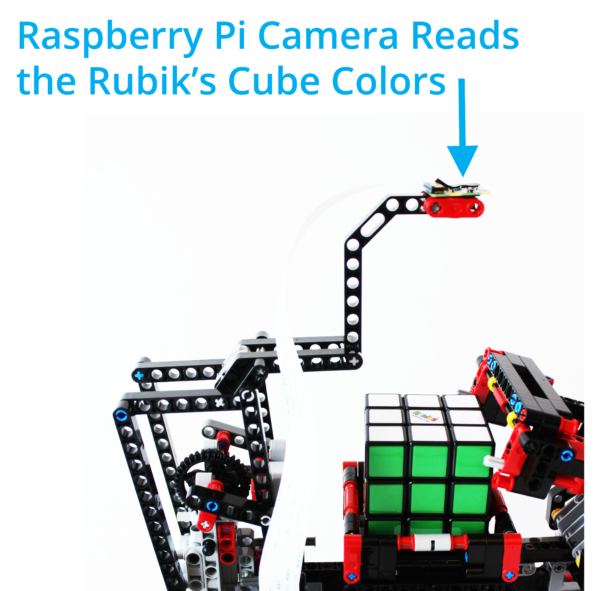
Camera arm — positions the Raspberry Pi Camera above the cube
Step 2 – Assemble the BrickPi3
Follow the
BrickPi3 assembly guide
to put together the case. Attach the BrickPi3 board, Raspberry Pi, and the
Pi Camera ribbon cable. Use the LEGO EV3 "wings" to support the BrickPi3
and keep it level with the BricKuber body.
Step 3 – Connect the Motors
Shuffler motor → Motor Port D
Cradle motor → Motor Port A
Camera arm motor → Motor Port C
Step 4 – Attach the Camera
Secure the Pi Camera between the two LEGO beam supports on the camera arm.
Use a small strip of electrical tape to hold it in place. Verify the camera
can see the entire top face of the cube:
raspistill -o cam.jpg
Open cam.jpg and confirm the cube is well-centred in the frame.
Adjust the camera position and focus before continuing.
Software Setup
Install the BrickPi3 libraries
If you're using Raspberry Pi OS Trixie for BrickPi3 the libraries are already installed. Otherwise, run:
The robot will rotate the cube to each of the six faces, take a photo of each,
determine the configuration, calculate the solution, and then execute every move
automatically.