Powered by Raspberry Pi
BrickPi3 bridges your LEGO NXT & EV3 hardware to the Raspberry Pi — unlocking Python, C, Wi-Fi, and the full power of modern computing.
BrickPi3 replaces the MINDSTORMS Brick with the full power of the Raspberry Pi — web connectivity, multiple programming languages, and an open ecosystem, all in one elegant board.
LEGO MINDSTORMS is a powerful robotics platform, but when it comes to a networked world it has limitations. BrickPi3 was built to fix that. Plug your existing NXT or EV3 sensors and motors directly into the BrickPi3, mount it on your Raspberry Pi, and you instantly gain:
Connect up to 4 NXT or EV3 motors simultaneously. Full PWM speed control via TB6612FNG drivers rated at 1.2 A continuous.
Use any NXT or EV3 sensor — digital or analog — in any of the four sensor ports. Gyroscopes, ultrasonic, color, touch, and more.
The Raspberry Pi 3's on-board Wi-Fi lets you control your robot remotely, integrate web services, and network multiple robots together.
Official Python and C drivers are included out of the box. All source code is open on GitHub for you to tinker and extend.
12 V nominal battery powers both BrickPi3 and Raspberry Pi. Auto motor-disable protects the Pi if voltage drops below 6 V.
One Grove I²C port (5 V) with built-in level-shifting lets you attach Dexter sensors like the PivotPi servo controller.
Six-sided acrylic case with LEGO-compatible connection points on every face so you can build any robot chassis you imagine.
BrickPi3 and Raspberry Pi communicate over SPI at up to 500 kbps. Fast, reliable, and deterministic sensor & motor updates.
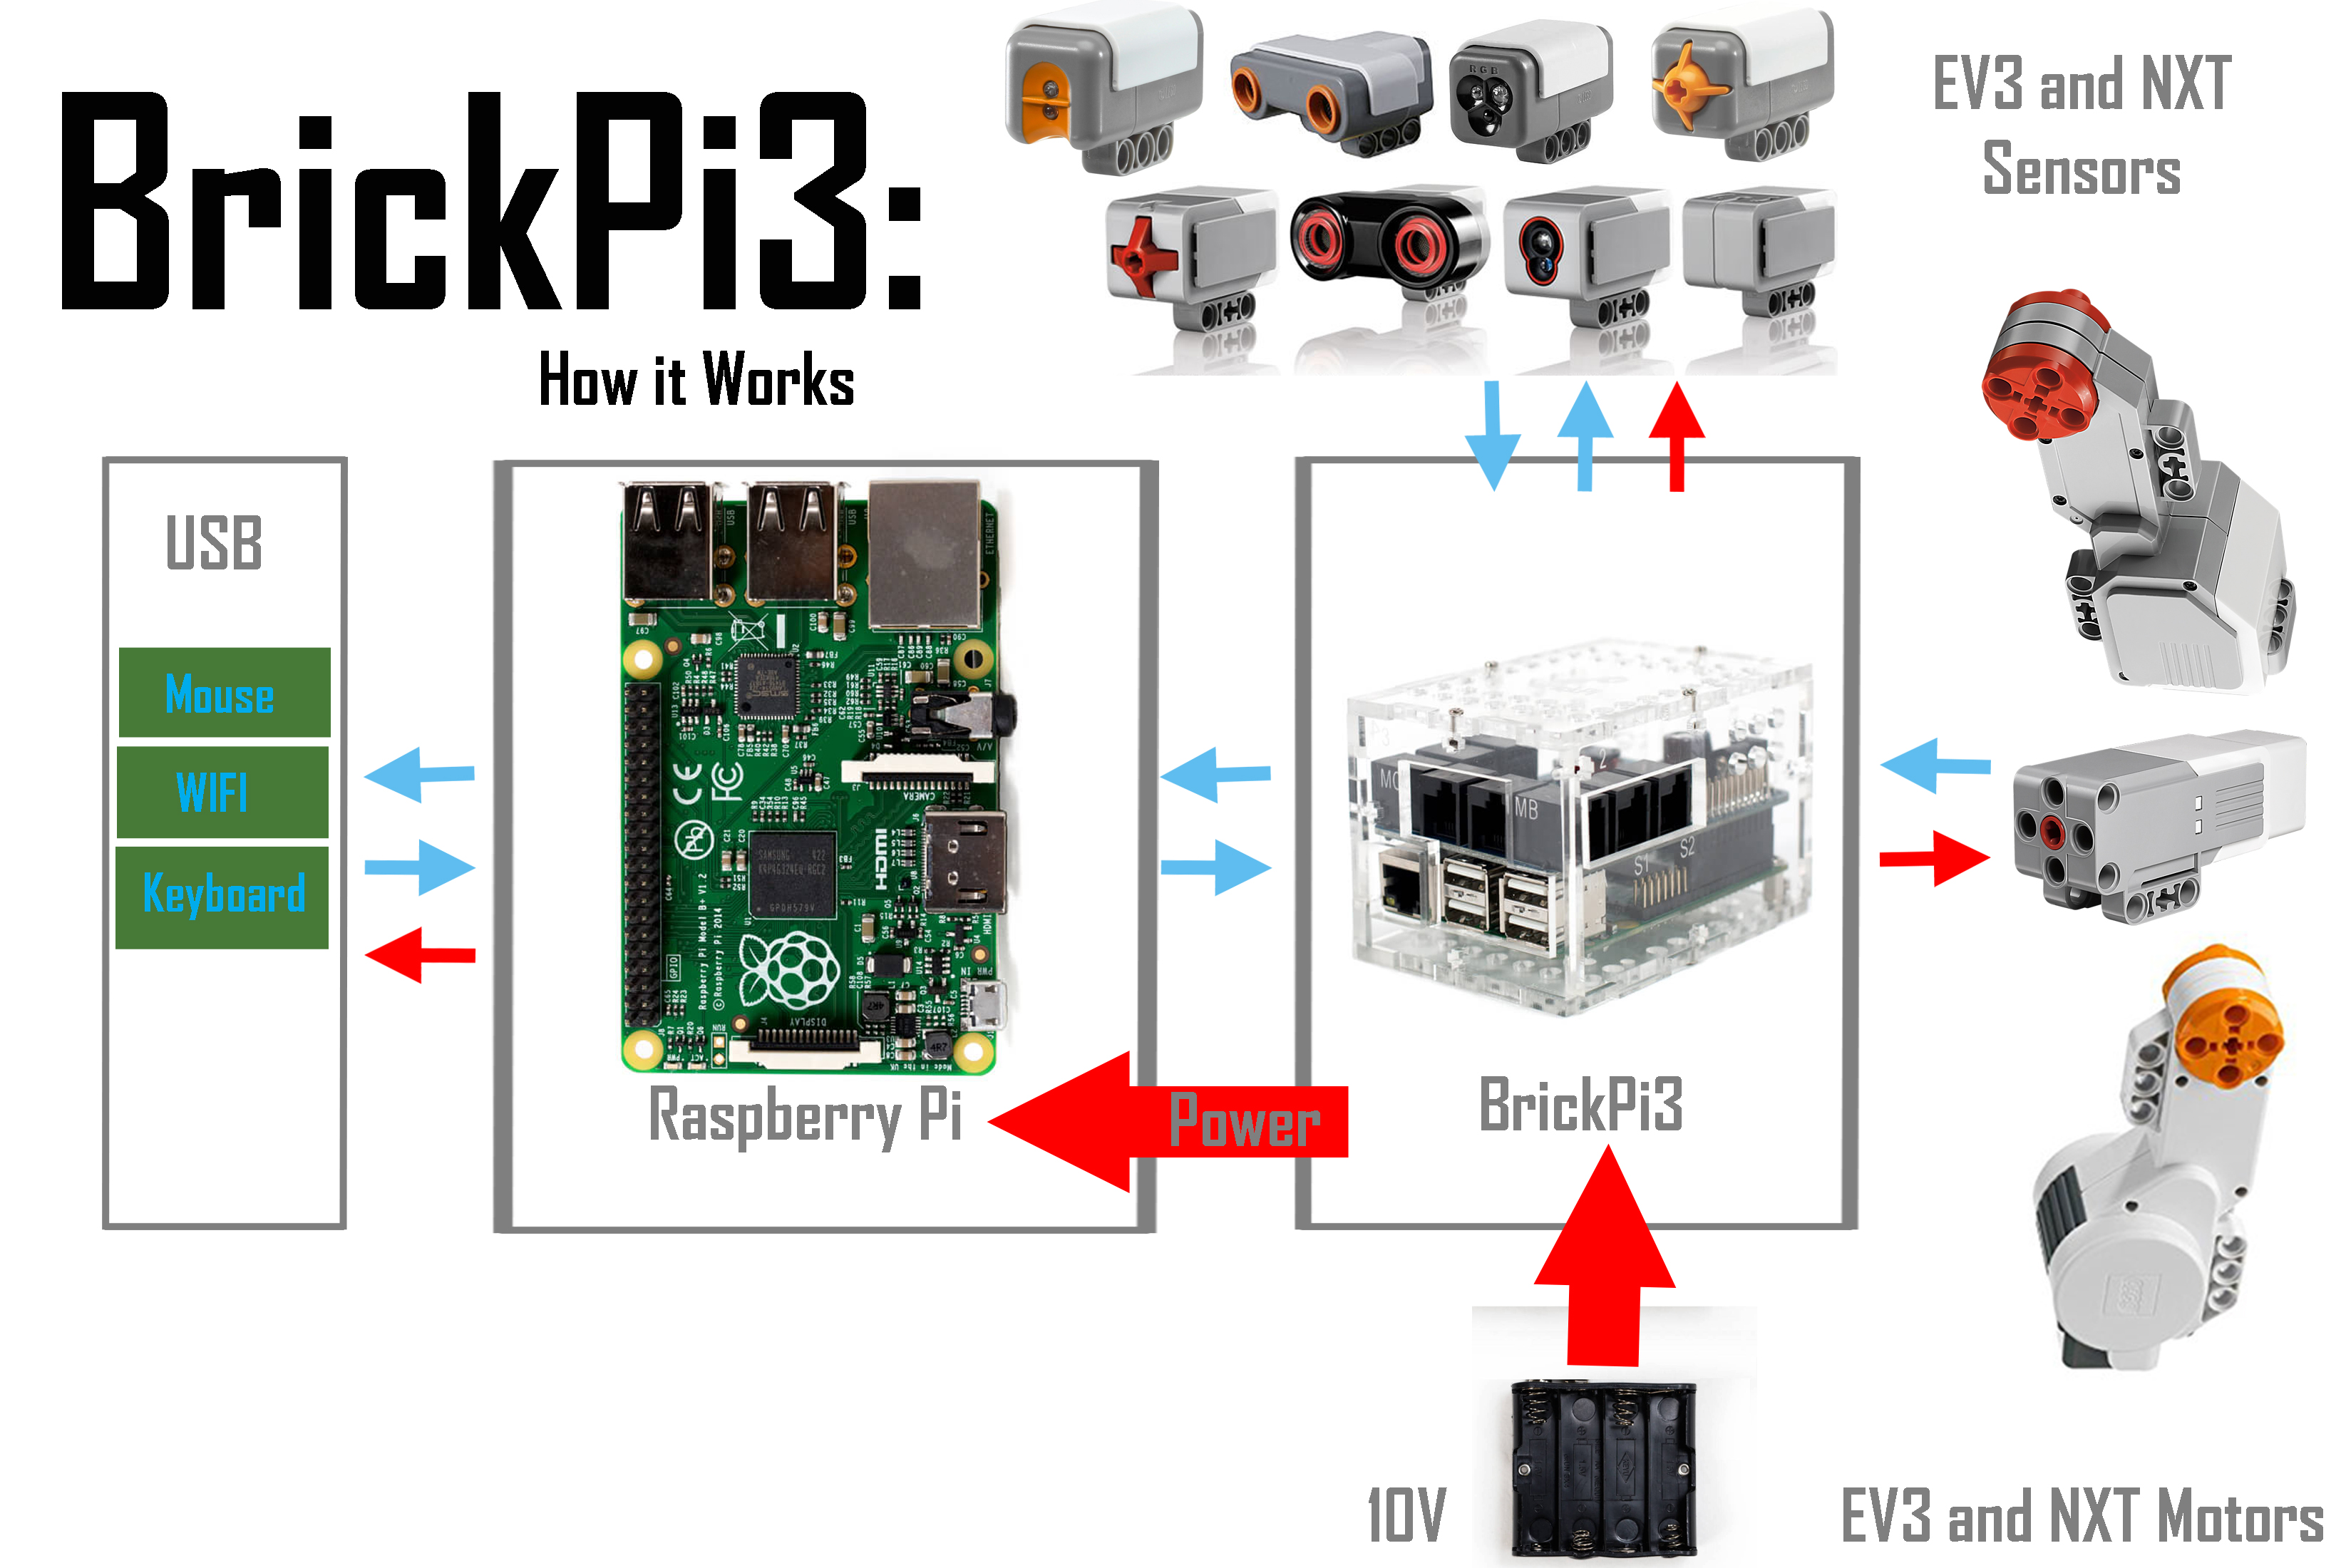
The Raspberry Pi sends orders over SPI to the BrickPi3 microcontroller, which drives your motors and reads your sensors — then reports back, closing the control loop.
The BrickPi3 Core is perfect if you already own a Raspberry Pi and LEGO MINDSTORMS — everything you need to get started, nothing you don't.
$169
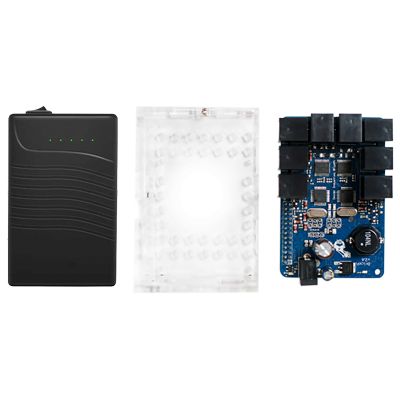
Connect your Raspberry Pi to LEGO NXT & EV3 motors and sensors. Includes the BrickPi3 board, a 6-sided acrylic case, case hardware, and a rechargeable lithium-ion battery.
Requires: Raspberry Pi, LEGO MINDSTORMS sensors & motors, microSD card with Raspberry Pi OS Trixie for BrickPi3.
$760.50
$845.00 Save 10%Buy 5 or more units and save 10%. Perfect for classrooms and school robotics programs.
Requires: Raspberry Pi, LEGO MINDSTORMS sensors & motors, microSD card with Raspberry Pi OS Trixie for BrickPi3.
To order, use the Buy button on the left, set the quantity to 5, and enter code CLASSROOM10 at checkout for 10% off.

$19
Crystal-clear 6-sided acrylic enclosure. Protects the board while keeping all ports and status LEDs visible.
🛒 Buy button coming soon — contact accounts@modrobotics.com to order.
$5
Standard ethernet cable for connecting your Raspberry Pi to a router. Useful for initial setup before WiFi is configured, or in wired classroom environments.
$3
Extended cable for the BrickPi3 rechargeable battery. Gives more reach when mounting the battery away from the board — ideal for larger robot builds.
"I offered BrickPi as an option for students in my robotics elective course, and it was a great platform that allows us to plug and play with LEGO MINDSTORMS sensors and motors, but also connect to the web and work through wi-fi."
— Professor Jussaume, University of Tulsa
Follow our step-by-step guides — from unboxing to running your first Python program on a LEGO robot.
Flash Raspberry Pi OS, set up WiFi, and install the BrickPi3 Python library — before you open the box.
Read Installation FAQ →Install the BrickPi3 board onto the Raspberry Pi, assemble the acrylic case, and power up the BrickPi3.
Read Guide →Attach LEGO MINDSTORMS NXT/EV3 sensors, motors, and Technic parts to the board and case.
Read Guide →Write your first program in Python or C and watch your LEGO robot come to life.
Read Guide →Answers to the most common forum questions: OS compatibility, SPI errors, LED codes, sensors, Ubuntu, ROS2, and more.
Browse Knowledge Base →Dive into schematics, power specs, SPI protocol details, and motor driver ratings.
Read Guide →| Motor Ports | 4 × NXT or EV3 (digital) |
|---|---|
| Sensor Ports | 4 × NXT or EV3 (digital & analog) |
| Motor Driver | TB6612FNG — 1.2 A continuous, 3.2 A peak |
| Grove I²C | 1 × Grove I²C port (5 V, with level shifter) |
| Communication | SPI (Raspberry Pi master) up to 500 kbps |
| Battery Voltage | 12 V nominal; 7.2 V – 10 V recommended; max 14.5 V |
| 5 V Regulator | Buck regulator — 1.5 A continuous, 3 A peak |
| 9 V Boost | 9 V boost from 5 V supply for sensors requiring >5 V |
| 3.3 V LDO | Powers BrickPi3 microcontroller (from 5 V supply) |
| Power Connector | 2.1 mm × 5.5 mm barrel jack, center positive |
| Auto-disable | Motors auto-disable below 6 V or Pi voltage < 4.85 V |
| Open Source | GitHub: DexterInd/BrickPi3 |
| Schematic | BrickPi 3.2.1.pdf (GitHub) |
| Recommended Age | 10+ |
| Supported Pi Versions | All Raspberry Pi versions (Pi 3 recommended) |
BrickPi3 ships with official Python and C drivers, giving you two powerful options — from quick scripting to low-level hardware control.
# Install BrickPi3 library, then:
import brickpi3

BP = brickpi3.BrickPi3()

# Set motor A to 40% power
BP.set_motor_power(BP.PORT_A, 40)

# Read a touch sensor on port 1
BP.set_sensor_type(BP.PORT_1, BP.SENSOR_TYPE.EV3_TOUCH)
value = BP.get_sensor(BP.PORT_1)
print("Touch sensor:", value)
All source code and examples are available free on GitHub.
From cube-solving robots to self-balancing Segways — BrickPi3 makers have built some amazing things.
A self-balancing Segway built with LEGO EV3 parts, BrickPi3, and a Raspberry Pi. Uses the EV3 gyroscope and is controlled with the LEGO remote. Full build instructions and Python source provided.
View Project →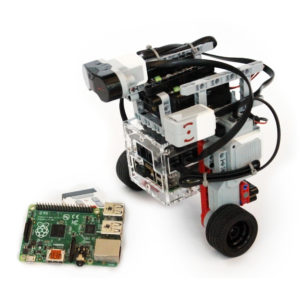
An open-source Rubik's cube solving robot you can build yourself using BrickPi3, a Raspberry Pi camera, and LEGO MINDSTORMS. Scans the cube faces and calculates the optimal solution.
View Project →An automated page-turning robot that reads books aloud using a Raspberry Pi, BrickPi3, and text-to-speech. A fun demonstration of combining LEGO mechanics with Pi computing.
View Project →Tired of snoozing? This rolling alarm clock drives away when the alarm fires, forcing you to chase it to shut it off. Classic BrickPi creativity in action.
View Project →All the code, schematics, and building instructions are open source. Fork, remix, and build something amazing.
Browse GitHubFull step-by-step getting-started guide, technical specs, and sample code libraries.
Open-source Python and C drivers, project source code, hardware schematics, and more.
Ask questions, share projects, and get help from the BrickPi3 community.
BrickPi3 OS image based on Raspberry Pi OS Trixie with all drivers pre-loaded. Default hostname: brickpi, username: brickpi, password: robots1234. Raspberry Pi Connect is supported but not enabled by default.
Full BrickPi 3.2.1 schematic in PDF format for hardware hackers and educators.
Power system, motor drivers, SPI protocol, Grove I²C specs, and LED status codes.
Solutions to common setup and runtime issues with the BrickPi3.